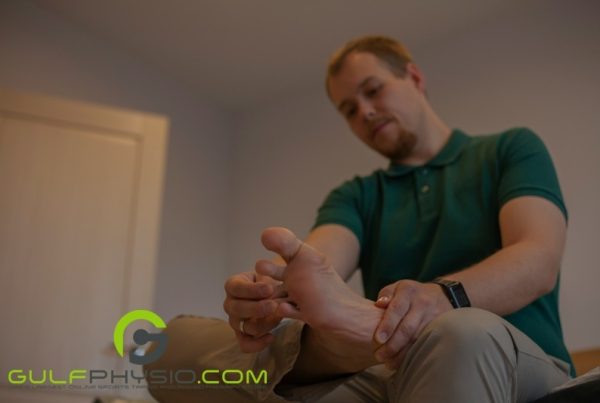

As you might know, cricket is not without a few bumps and bruises. That’s why cricket taping is used. It stabilizes and protects the body’s muscles and bones. It reduces the risk of injury while providing support and stability to the body during physical activity.
This article will detail the different methods, techniques, and tips players should apply when taping for cricket. So, let’s learn more about the dynamics and specifics of cricket taping.
Table of Contents
Benefits of Cricket Taping
When it comes to cricket taping, it does serve more purposes than you think. The format and duration of cricket lead to overuse injuries to players’ fingers. Bowlers would always get injured in their fingers but pitches, batters, wicketkeepers, and fielders also struggle with this.
This is why taping is an essential part of any cricket player’s training regimen, after all. Beyond treating injuries, cricket taping provides numerous benefits to players, such as the following:
- It helps to ensure the stability and protection of the muscles and bones, reducing the risk of injury.
- It also improves the player’s performance by providing additional support and enabling them to move more freely.
- Cricket taping lessens pain and discomfort and speeds up healing in case of an injury.
- Additionally, it provides extra support during strenuous activities and helps to improve balance and coordination.
- Finally, it can reduce players’ fatigue, allowing them to perform at their best for extended periods.
Finger Taping
Cricket players tape their fingers, so they don’t get hurt when the hard cricket ball hits them.
Cricket taping, like the techniques below, helps the impact of the ball go to the wrist instead of the fingers, which makes it less likely that the fingers will get hurt. It also helps finger injuries from getting worse. Use the following methods to lessen the strain on your digits:
Collateral Interphalangeal Joint

| Purpose | To support and stabilize the proximal interphalangeal (PIP) joint of the phalanges. |
| General Conditions | Proximal IP joint sprain |
| Material/s Needed | ½-inch adhesive tape |
| Position | IP joint in slight flexion |
Taping Procedure:
- Place the anchor strips around the proximal and distal ends of the phalanges.
- Starting on the front of the proximal anchor, put the tape across the middle joint line, under the finger, and up to the distal anchor.
- After that, kick off on the front of the distal anchor, cross the lateral joint line, go under the finger, and end at the proximal anchor.
- To ensure this method is secure, put a second anchor over the tape ends.
Combining this method with finger splinting can reinforce the affected joint even more. It’ll make it easier for the joint to move on its own.
Buddy Taping

| Purpose | To give mild to moderate support to your fingers’ collateral ligaments. As the name suggests, the injured finger is taped together with its buddy, the largest finger next to it, to give it support. |
| General Conditions | Sprains, dislocations, and fractures |
| Material/s Needed | ⅛-inch foam, ½ non-elastic tape, tape spray, and tape scissors |
| Position | Hands and fingers in a neutral position. |
Taping Procedure:
- Make sure the fingers are dry and clean.
- Place gauze between the affected phalanges and the ones next to them.
- Tape two fingers adjacent to each other.
- Wrap ½ adhesive tape above and below the injured joint.
- In high-risk sports, you should pair and tape the second & third phalanges and the fourth & fifth phalanges together.
X-Pattern

| Purpose | To provide mild to moderate support to the collateral ligaments of the finger’s PIP joint after sprains, dislocations, and fractures. Use this technique with people who need help but want all their fingers to move by themselves. |
| General Conditions | Sprains, dislocations, and fractures |
| Material/s Needed | ½-inch non-elastic tape, taping scissors, and tape spray |
| Position | Hands and fingers in a neutral position. |
Taping Procedure:
- Alternately apply ½ inch non-elastic tape directly to the skin over the PIP joint’s lateral and medial joint lines with moderate roll tension to form an “X”.
- Each strip should reach proximally and distally to the PIP joint but not over the DIP or MCP joints.
- Once you’ve made an “X” on both sides of the PIP joint, do it again, but this time, overlap the tape.
- Roll the ends of the “X” strips, leaving them on the dorsal aspect of the finger, and secure them with circular anchors.
Elbow Taping
The elbow connects the forearm to the upper arm. You may be at risk if you are an athlete who pitches many games or does a lot of overhead activity.
If you have elbow pain, limited range of motion, throbbing, or swelling, you may have an elbow injury. If you are younger, you may be more vulnerable due to poor technique. This results in overuse and incorrect elbow form. Hence, you may need these cricket-taping techniques below:
Collateral X Taping

| Purpose | To provide support and protection against mild to moderate varus forces at the elbow. |
| General Conditions | Elbow sprains |
| Material/s Needed | 2 to 3-inch heavyweight elastic tape |
| Position | Sitting with the injured elbow in slight flexion. |
Taping Procedure:
- Place an anchor using 2 to 3 inches of heavyweight elastic tape around the upper arm near the shoulder and the middle of the forearm.
- Anchor the first two strips of heavy-duty elastic tape on the side of the upper arm near the top. Continue distally over the elbow joint with moderate roll tension and anchor on the back of the mid-forearm.
- Anchor the second strip on the back or front of the upper arm. Then, cross the joint with moderate roll tension, and end on the front of the middle of the forearm, making an “X” over the radial collateral ligament.
- Start the third strip on the side of the upper arm near the joint. Continue over the joint with the same moderate roll tension and anchor on the side of the middle of the forearm.
- Repeat the strips, overlapping the tape by one-third of its width. Work with the tape on the upper arm and mid-forearm to make three or four circular closure patterns.
- Then, overlap the tape by half of its width. The closure patterns shouldn’t close off the cubital fossa or make it narrow. Anchors made of tape that doesn’t stretch aren’t needed.
Hyperextension Technique
| Purpose | To stop the elbow from bending too far and to stretch the soft tissues. |
| General Conditions | Sprains and strains |
| Position | The elbow joint supinated and in slight flexion. |
Hyperextension Technique 1

| Material/s Needed | 2-inch or 3-inch elastic tape and 1 ½ inch adhesive tape |
Taping Procedure:
- Use two strips of 2-inch elastic tape as anchors.
- Place the proximal anchor over the belly of the biceps muscle, and place the distal anchor on the distal one-third of the forearm.
- Make a 5-to-7-strip butterfly using adhesive tape.
- Before using this support pattern, wrap a strip of tape around the middle.
- Apply the butterfly pattern from the closest anchor to the farthest anchor. The right tension is needed here to ensure the elbow doesn’t fully extend.
- Place a second set of anchor strips using elastic tape.
Hyperextension Technique 2

| Material/s Needed | Skin lubricant, tape spray, and 2 or 3-inch heavyweight elastic tape |
Taping Procedure:
- Apply anchors on the middle of the upper arm and the forearm.
- Anchor a 2 or 3-inch strip of heavyweight elastic tape on the medial anterior proximal upper arm.
- Continue across the cubital fossa and anchor on the medial anterior mid forearm. Use a moderate amount of roll tension to put the strip in place.
- Keep an eye on the elbow’s position so it doesn’t hurt.
- Place the next heavyweight elastic tape strip on the anterior proximal upper arm.
- Overlap the first by half the tape width across the cubital fossa and anchor on the anterior mid forearm.
- Apply a strip from the lateral anterior proximal upper arm, which overlaps the second strip by half its width.
- Continue across the cubital fossa and anchor on the lateral anterior mid forearm.
- With heavyweight elastic tape, create three to four circular closure patterns with the same mild tension around the proximal upper arm and mid-forearm.
- There is no need for non-elastic tape anchors.
- Keep an eye out for constriction in the cubital fossa.
Shoulder Taping
Cricket players often have shoulder pain because they throw and bowl over and over again.
When you throw, catch, or hit the ball, your shoulder muscles are more likely to get hurt. This injury mostly happens in the rotator cuff, a group of four muscles. It keeps the shoulder stable, even when moving the arms overhead.
Make sure to secure your shoulders with the following cricket-taping methods:
Acromioclavicular Joint Sprain Tape

| Purpose | To provide the acromioclavicular joint with stability and support. |
| General Conditions | Contusions and sprains |
| Material/s Needed | 1½-inch adhesive tape, 2-inch elastic tape, and large bandage/s or gauze |
| Position | The athlete should stand with their shoulders abducted, elbows flexed, hand on their waist, and chest slightly expanded. |
Taping Procedure:
- Place the athlete in a standing position with their hand on their waist, with the shoulder 45 degrees from their body.
- To protect the nipple, put a bandage or hypoallergenic gauze underlay around it.
- If you have it, use hypoallergenic gauze underlay tape to protect the skin where you place the upper and lower anchors.
- On the trunk, use a superior anchor.
- Using a long vertical strip, start below the nipple and pull the tape tight.
- Guide it over the collarbone and down the back of the scapula until it is the same length as the front of the tape.
- Ensure the tape isn’t pulled down over the clavicle, as this could hurt and stop the blood from flowing and nerves from working.
- Put a horizontal strip of tape under the armpit by connecting the ends of the front and back parts of the long vertical strip.
- Place an inferior circumferential anchor halfway up the upper arm.
- Apply a diagonal strip of tape, starting behind the inferior anchor on the arm and going diagonally and laterally over the upper arm.
- Get a diagonal strip of tape again, beginning at the lower anchor on the arm and going diagonally and laterally over the upper arm.
- The diagonals should form an X over the side of the arm (over the deltoid muscle).
- Repeat the last two steps with two more diagonal tape strips, ensuring that each set overlaps the previous set by about half the width of the first set.
- Over the side of the upper arm, three sets of diagonal tapes should form an X.
- Apply three vertical strips that overlap on the side of the arm. Each strip should start on the side of the lower anchor and end in the middle of the upper anchor on the top of the shoulder.
- Apply two lock-offs, one over the top anchor and one over the bottom anchor, to ensure all the tape strips are secure.
Shoulder Stabilization Strapping

| Material/s Needed | 3.8cm to 5cm zinc oxide tape, Fixation tape, and Kinesiology tape |
Taping Procedure:
- Make your anchors out of Fixation Tape. Place a strip from the middle of the pec to the middle of the scapula.
- If you choose the 10cm width, you should only need one strip.
- Use either zinc oxide 3.8cm or 5cm, depending on the size of the shoulder
- Put an anchor of zinc oxide tape in the middle of the bicep.
- Ask your patient to tense their bicep as you apply, so it is at its largest. This technique will stop the tape from squeezing the area if the muscle gets bigger while working out.
- Your first strip should start at the bicep anchor and go up along the middle of the deltoid. Use enough force on the tape to lift the deltoid.
- Reinforce by putting a strip on each side in a slightly different place. It will lift the deltoid, even more, each time.
- Add a strip from the anterior anchor over the AC joint to the posterior upper anchor to add more support around the AC joint.
- Repeat from the back to make an X shape over the middle of the AC joint.
- Use zinc oxide tape to put your anchors back down.
- Cover with kinesiology tape if more water protection is needed.
Full Shoulder Strapping

| Material/s Needed | Kinesiology tape, zinc oxide tape, and fixation tape |
Taping Procedure:
- Tape the deltoids first using kinesiology tape.
- Measure the length of the tape from the top of the deltoid to the top of the acromion. Then, leave a little extra for the muscle to stretch.
- Rip the backing paper so that you can place the base of the tape over the deltoid tuberosity with a slight aim toward the front.
- Get the patient to put their hand behind their back. This arrangement puts their shoulder in a position of horizontal adduction and medial rotation.
- Place the rest of your K tape strip over the back of your shoulder toward the acromion.
- Put the arm back in the neutral position and put down your second anchor, but aim for the middle this time. Again, be careful that you do not push this into place.
- Ask your patient to put their arm straight across their chest and use their other arm to support it if needed. It moves the shoulder into three positions: abduction, extension, and rotation outward.
- Place the rest of your second strip over the front of your shoulder toward the acromion.
- Fixation tape needs to be measured and put on from the front to the back of the shoulder.
- Pull the shoulder back as you put zinc oxide tape over the fixation tape. This will keep the shoulder from moving and correct your posture.
- Measure kinesiology tape along the length of the supraspinatus muscle, starting from the front of the shoulder.
- Make a Y strip by cutting your strip down the middle, leaving a small tab, and rounding the edges.
- Put the patient’s hand behind their back and rotate the shoulder inwards again.
- Set the anchor at the front of the shoulder and run the rest of the tape along the line of the supraspinatus with 0% stretch.
- Cover the zinc oxide strips with K tape to finish.
- Measure the length of the zinc oxide tape with the kinesiology tape.
- Round the edges and put it right on top of the zinc oxide tape with no stretch.
Rib Taping

A side strain is an injury to the obliques, which is on the side of the body. Cricket players often get this kind of injury. It happens on the opposite side of the bowling arm because the muscle is forced to contract.
Lessen the strain on your ribs with this simple cricket-taping technique for your sides:
| Purpose | To provide compression and support to the ribs. |
| General Conditions | Contusions and sprains |
| Material/s Needed | 2 or 3-inch elastic tape, 1½-inch adhesive pad, 4 or 6 inches extra long elastic wrap, and bandages or gauze pads |
| Position | Standing straight with the affected arm in abduction |
Taping Procedure:
- Use a gauze pad or a bandage to cover the nip.
- Put two vertical anchor strips near the front and back mid-lines on the unaffected side of the body.
- A strip of tape starts at the end of the posterior anchor, follows the shape of the ribs, and ends at the end of the anterior anchor.
- Have the person breathe in when you put the tape on them.
- Repeat the last step and stick on another six to eight strips of tape.
- Overlap half of the tape’s width.
- Start at the bottom and work your way up.
- Put an extra-long 4″ or 6″ elastic wrap over the top.
- With the chest out, put the wrap around the torso in a circle, starting at the bottom and working up.
- Secure the wrap with a strip of elastic tape that is one piece.
- Use adhesive tape to hold the elastic tape in place.
Lower Back Taping

Cricket players often have back pain because they have to move around so much. Low back pain is common in cricket because bowling and batting require constant bending. It happens when you bend your back for long periods.
If you experience lower back pain when playing or you want to avoid it, use the following cricket-taping method:
| Purpose | To give your low back support. |
| General Conditions | Sprains, strains, and contusions. |
| Material/s Needed | 1½ or 2-inch adhesive tape and 6-inch extra long elastic wrap |
| Position | Standing with the knee and waist in slight flexion. |
Taping Procedure:
- Place two vertical anchor strips about 4 to 6 inches long over the sides of the torso.
- Use the “X” pattern approach. Start at the end of one anchor, cross the area needing help, and end on the other. Put the second strip similarly, but it starts from the other anchor.
- Repeat step 2 seven to nine times, overlapping the tape by half of its width each time.
- Now, apply parallel strips, working from the bottom until the affected area is covered. Overlap each strip by one-half of its width.
- A final anchor is placed on top of each original anchor to help hold the tape.
- Apply the elastic wrap around the waist in a circle. Stick a strip of tape to the wrap to keep it in place.
One suggestion for athletes who don’t want to wear sports taping for a long time would be to invest into orthopedic supports which include back supports, shoulder supports as well as leg and neck braces.
Which tape do cricketers use?
Cricket players can use different varieties of sports medicine tapes to ensure their fingers, elbows, and shoulders are well-protected from the intensive sport.
Here are some sports tapes that can be used:
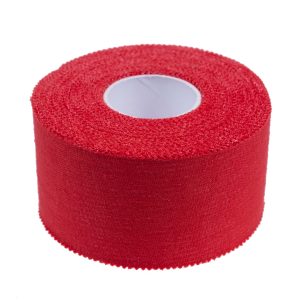
Cohesive bandage – lightweight, efficient, easy to use, and can be used for on-the-go sports games.
Elastic Adhesive Bandage – moderate support, woven cotton material, and has long-lasting strength.
Kinesiology Tape – used to address sprains, strains, and muscle and joint issues.
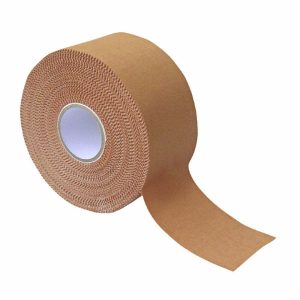
Zinc Oxide Tape – made from non-stretch cotton and it is perfect for providing support for joints that need to be restricted.
-
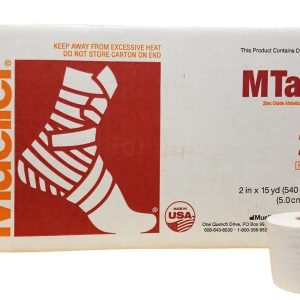 Mueller MTape Zinc Oxide Athletic 2in x 15 ydAED 510.00
 -
 FLAMIPLAST 8 CM X 6MTRAED 45.11
 -
FLAMIPLAST 10 CM X 6MTRAED 58.00
-
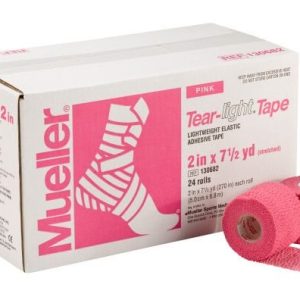 TearLight (Light Elastic Adhesive Bandage) Tape – 2″ (5cms wide)AED 600.00
 -
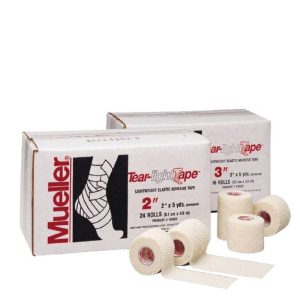 TearLight (Light Elastic Adhesive Bandage) TapePrice range: AED 500.00 through AED 580.00
 -
 Sports Tape- 1.5″ X 15 yards – 3.8cms X 13.8MAED 15.00
 -
 Rigid TapePrice range: AED 20.00 through AED 600.00
 -
Product on sale
 Self-Adherent Cohesive Wrap Bandage – Durable & Flexible Self-Sticking Compression WrapPrice range: AED 8.00 through AED 14.00
 -
 Electrical TapeAED 2.50